Handwriting Journal Page

I love searching and finding artists journal pages in the hope of being inspired. Whether it be a technique I’d like to try or the colour combinations or perhaps the style.

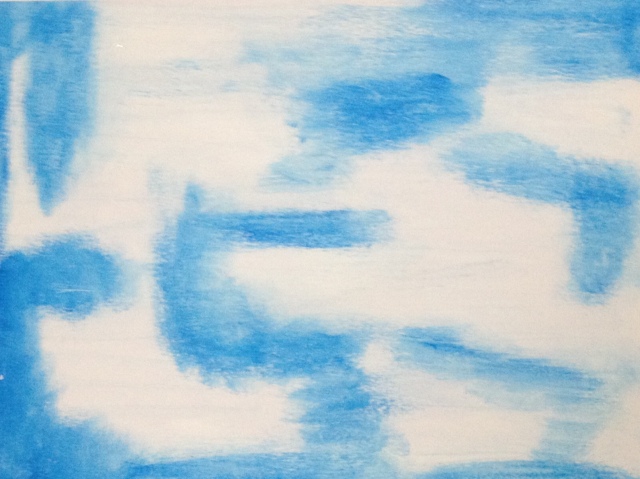
I’ll admit yesterdays page didn’t start so good. Not that there was anything specifically wrong, I just wasn’t feeling the pink and blue lol SO out came the gesso to cover it up, ready to start all over again lol.

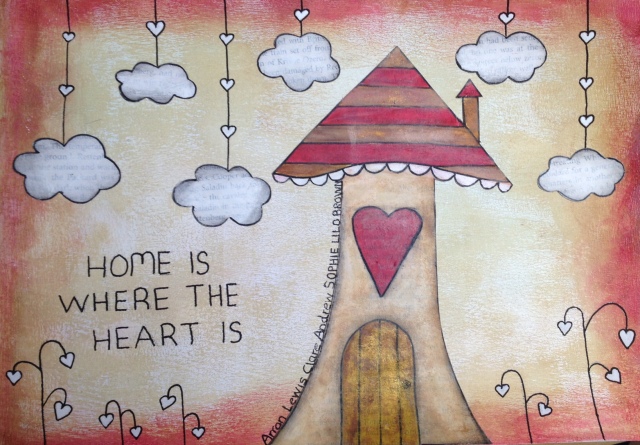
I had no plan with this page other than I wanted to do some kind of doodling. Eventually I decided upon a little cute house which I would quite happily craft in haha.

I hit a wall what to do next so I went on to finish some other design work. By the time I had that finished it was rather late and I was tired but I wasn’t ready to admit defeat just yet. So I got comfy in my bed with my sketch book, pencil and black fine liner.

photo 5

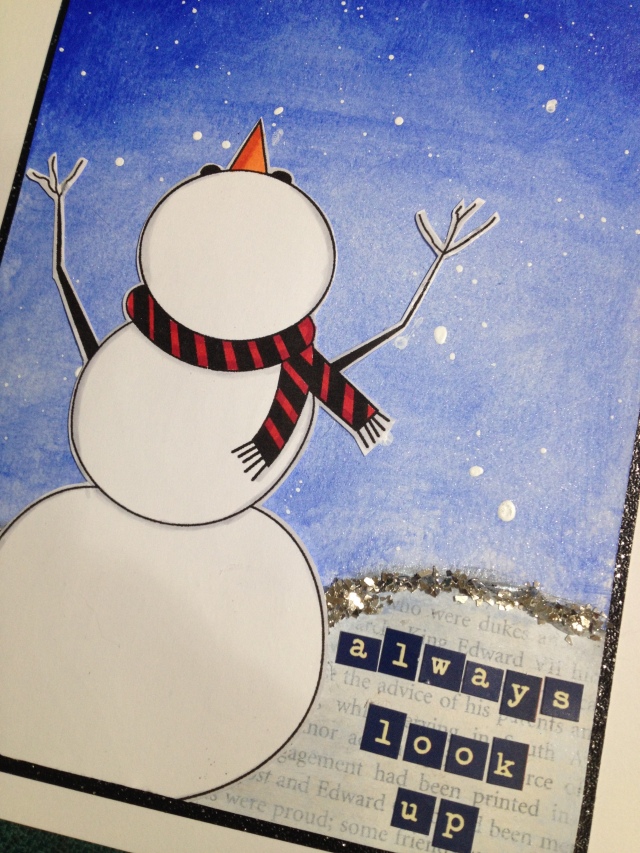
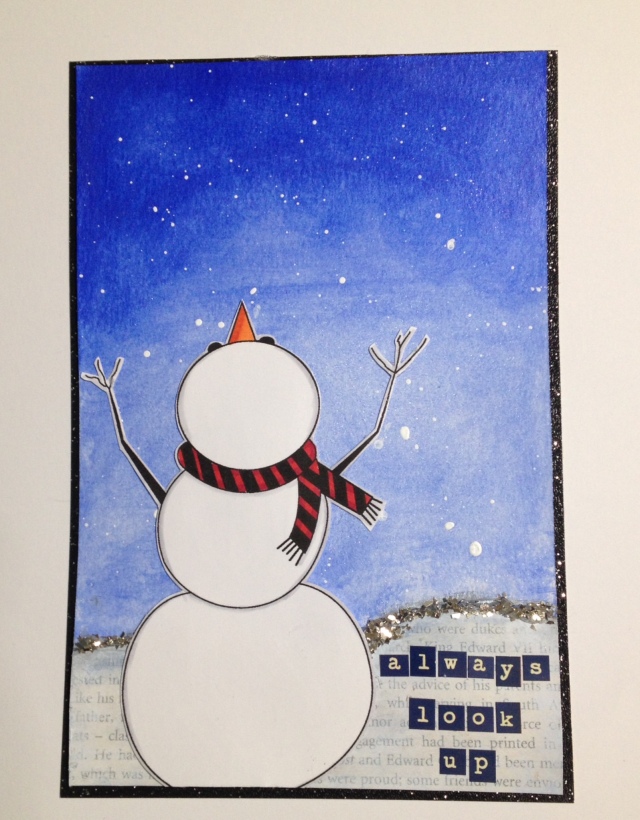
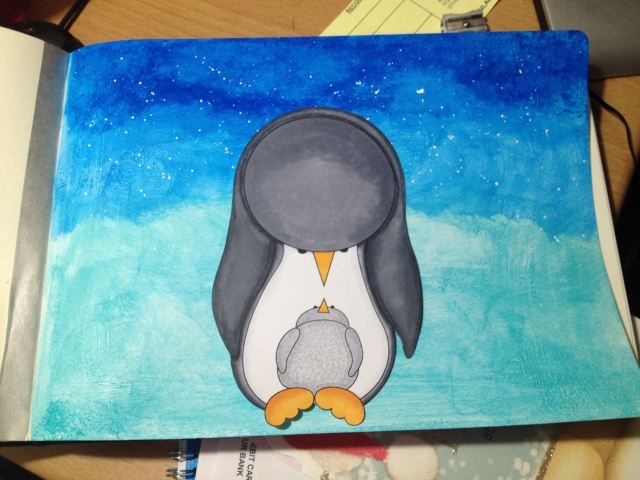
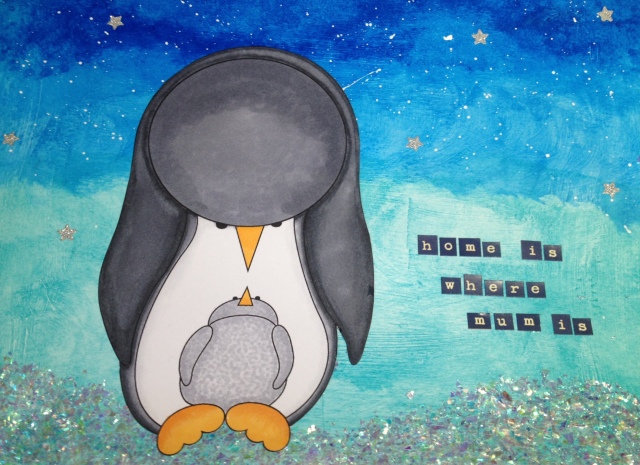
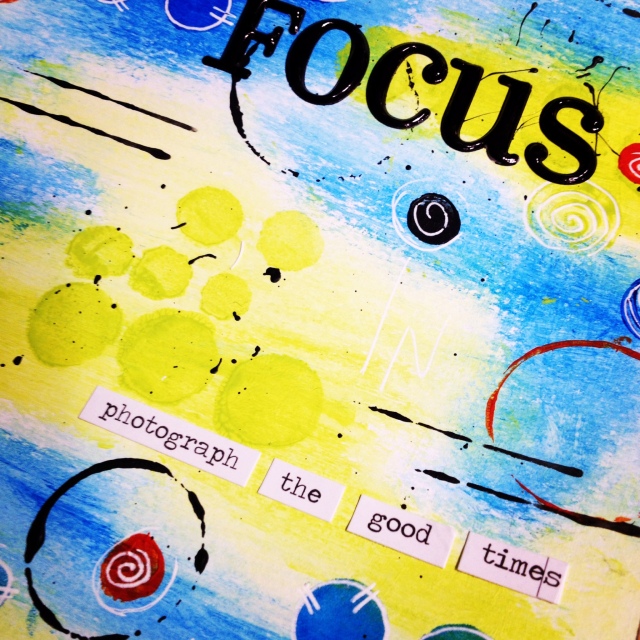
Here’s the finished page…

photo (6)

 Step by step…..

photo 1

1 -Add a layer of buff coloured acrylic paint (Daler Rowney). Using a wet baby wipe go around the edges with light brown acrylic paint (Daler Rowney).

photo 2
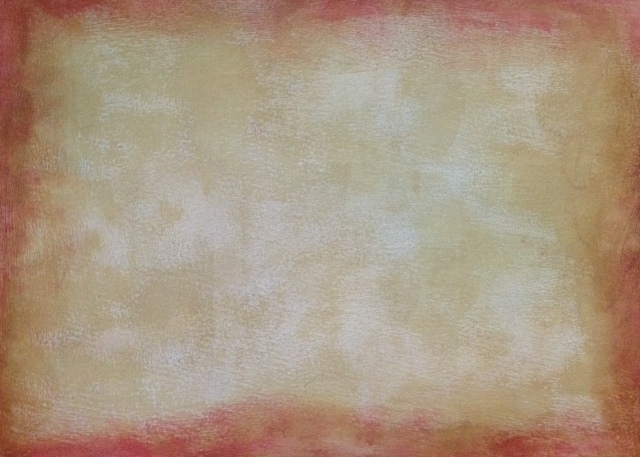
2- Using a wet baby wipe go around the edges with red acrylic paint (Daler Rowney).

photo 3

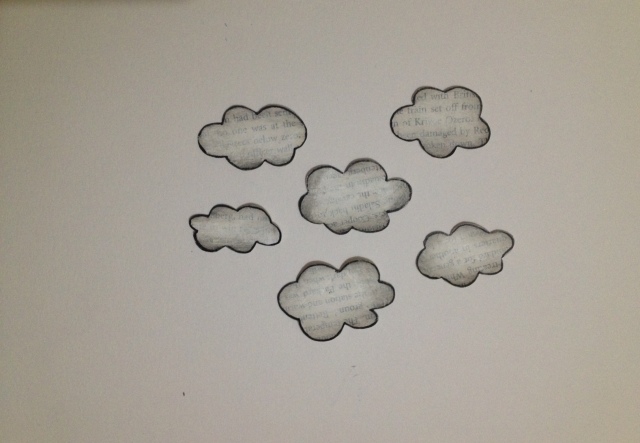
3 – Doodle some clouds onto an old book page using a pencil then cut out. Cover in white acrylic paint but not too much as they still want to be able to se the book text. Once dry use 0.5 black fine liner to go around the edges of the cloud. Now using your finger, slightly smudge the black link.

photo 1

4 – Using a black fine Posca pen doodle some hanging hearts. Now fill in the hearts using a fine white Posca pen. Fix the book paper clouds to the page using strong glue.
photo 4

5 – Doodle a house onto smooth white paper. Colour using acrylic paints and once dry add detail using a black fine liner pen. Using a wet baby wipe sweep to over the entire image to give an aged look.

photo 2

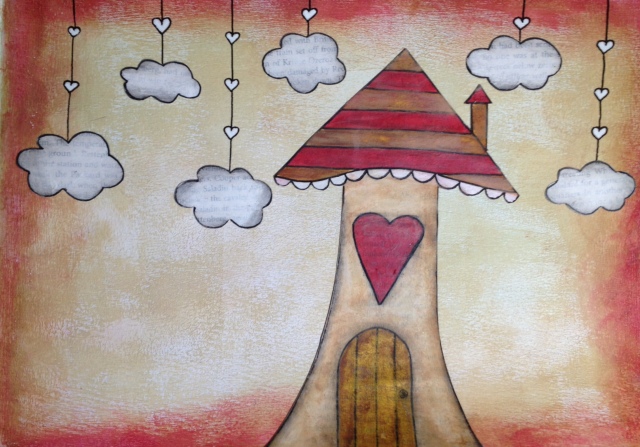
6- Fix the painted house to the right of the page.

photo 3

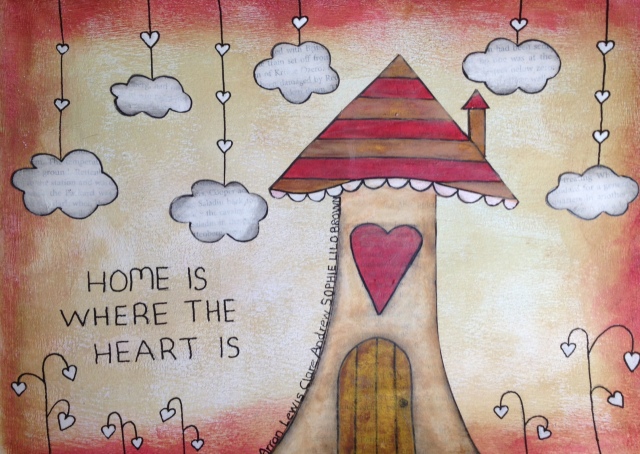
7 – Again using the black and white Posca pens, doodle some heart plants and some large text. To finish add some small text up one side of the house using a black 0.5 fine liner pen.

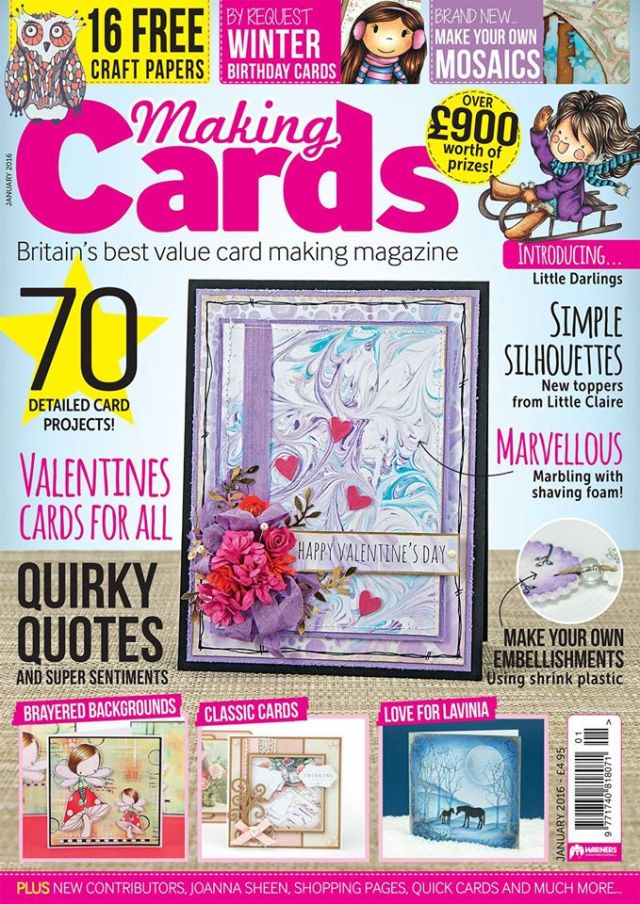
My next post is all about the latest edition of Making Cards magazine and this month I am on 3 pages, how amazing is that!

Clare x

Focus – Journal Page

Today I’m sharing with you my Messy Fun Friday journal page where I got the chance to try out a collage technique. This involves taking text from an old book page and transferring to a journal page.It’s fun, quick and so effective!

I also got the chance to use my camera girl image in my sketch book at long last. It was supposed to be used for another journal page that I blogged about but a girl can change her mind……right? ha ha.

photo 2

Here’s how I created my page…..

  1. Stick chipboard shapes onto mixed media card . photo 1
  2. Using medium gel cover the page with a sheet of crumpled tissue paper.photo 2
  3. Apply a layer of gesso across the entire page. Once dry add a layer of white acrylic paint. Leave until damp.photo 3
  4. Mix a small amount of blue paint with white acrylic paint. Using a baby wipe blend the light blue paint with the still damp white acrylic paint layer. Paint over the stars with a brush and silver paint. Next smudge silver paint around the edges of the page using a finger. Blend white acrylic paint randomly over the page, again using a finger. Now mix a small amount of Cosmic shimmer pearlescent mica powder with a little water to create a wash.Use a flat brush to spread the Cosmic Powder all over the journal page.photo 4
  5. Stick a piece of clear packing tape to a section of an old book. Smooth down the tape evenly until only a small corner is sticking up. Use this corner to then gently pull the tape off. Next I used water to rub away (use finger) the excess book page from the back of the tape, leaving the text still in tact.photo 5
  6. Scan my camera girl image from my sketch book onto my computer. Touch up using photo editing software then print onto Ryman’s smooth paper. Now colour using alcohol markers then trim to size.photo (5)
  7. Stick the coloured image to the right of the stars then create the word ‘focus’ from stickers. These stickers were originally blue so I changed them to black using a black alcohol pen.photo 2

Here’s a little close up or two!

photo 3

photo 4

Have a great weekend!

Clare

Journal – Snow Time!

It’s official we have snow!

Which means it’s an afternoon of snowman building time with my boys. It’s by coincidence that I had this snowman post scheduled.


photo 2

Today I want to share with you the process of how I take my hand drawn sketches to the next level then the next and so on. It’s something I’ve been doing a lot lately which I have grown to love.

First I drew my snowman in my sketch book.

Then I drew him on some old book pages  and created an A4 journal page.

 I also then decided to scan the image onto my computer and touched him up a little.

And finally I printed him out onto white card, gave him a little colour  using Promarkers then trimmed him to size before popping him onto a painted background.snowman

If I’m honest I messed up at the start when mixing my colours. I had picked up pearl white instead of white acrylic paint and added it to the blue eeeeeeep BUT I mixed it anyway, whats the worse that could happen?

It turns out it was one of those happy accidents we all have from time to time. When I added the blue to the paper it resulted in a lovely shimmery background which is so fitting for a starry sky. Next time I do this it will be on purpose ha ha.

 photo 1

Hope you are all enjoying the snow as much as I am.

Clare x

Messy Fun Friday – Penguin Journal Page

Whoop whoop Messy Fun Friday is now back after a little break over the festive period.

A new year brings new adventures and I took a huge leap of faith and bought my first ever Moleskine journal book……scary stuff! I spent days eyeing it up on my desk before taking brave steps to make a start on my first page.

moleskine

It was during a facetime call with my super talented friend Jaine, I took the plunge so to speak.

photo 1

Small child loves penguins and his collection is growing just as quick as he is. Current number is 5 soon to be 6, that’s between you and I wink wink! ha ha.

photo 5

 So, inspired by his love of penguins and my love for him I drew this. My mission this year is to draw more often which with plenty practise my drawing skills should improve……

photo 3

This is how I created my background journal page…

1 – Cover the entire page in white gesso. I used a flat brush to create texture. Next allow to dry. Using  Dowler Rowney Primary Blue acrylic paint, cover the top half  of the page. Now add Paperartsy Beach Hut to the lower half of the page blending using a baby wipe. Dilute some white acrylic paint with water and using a small brush ,splattere paint across the top half of the background.

photo 5

2 – Tear a piece of paper to create hills and place slightly above the bottom of the page.

photo 2

3 -Add glue below the paper, then cover in shaved ice by Stampendous. Now lift the torn piece of paper, place it over the shaved ice then press gently to fix the shaved ice to the journal page.photo 3

4 – After outlining the penguin using a 0.5 Uni Pin black liner pen, the image was then scanned onto the computer and touched up. Saving the file allows you to access the image for future projects…I’m thinking 2016 Christmas cards hahahahaha.

photo 2

5 – The penguins were then coloured using  alcohol pens. I created the fur on the baby penguin by stippling the pen onto the paper. Cut the image to size.

photo 1

6- Using glue, fix the penguin image to the background page.

photo 4

5 – Punch small stars from glitter paper and dot around the sky background. Add a sentiment using letter stickers to complete.

photo 4

Next week I’ll be sharing my finished camera girl journal page that I started a few weeks back. You can read about how I created the background on my Focus on the good times post.

Clare x


Happy New Year

A big Happy New Year to you!

2015 was an eventful but exciting year. Goals were achieved, new opportunities came my way and new adventures started.

Here’s my year in review……

The start of the year kicked off  with a trip to Stitches in Birmingham in February. I had a blast meeting new people and catching up Sarah Hurley, Jaine Drake and the rest of the design team. It was a real learning curve allowing me to make decisions and plan for the future ahead. Would you believe in a few weeks time I’ll be doing it all again with a twist!

jaine

April I opened my Etsy store where I sell my MINI MAIL and MINI MAKES range.

en_isell_1

Not long after my feet landed back home it was soon time to hop back on a plane in April, this time to Coventry for CHA Creative Exchanges Designer event. It was non stop fun where I got the chance to meet lots of amazing people. The seminars were so educational, my little notebook sure got a hammering.I honestly can’t wait to do it all again this year.

May brought the biggest change when I decided to give up my day job as Play leader at my local charity toddler group. However despite my heart breaking and lots of tears I knew it was the right decision. And as a good friend once told me you always have to look forward.

In June I got the amazing opportunity to get published in Making Cards Magazine and have since been a regular contributor, how exciting is that! I’m proud to be a part of such an amazing team.

Attachment-1

July was time to visit my best friend Sarah Hurley and a lessoned learned to never accept a jelly been from her ever again ha ha

sarah

I also had a marathon to run. Running the marathon resulted in raising lots of money for Accord Hospice in Paisley, where my mother in law sadly spent the last few weeks of her life after battling cancer.

August was crazy busy juggling work whilst the children were off school for the summer holidays. 

feet

September  and October I got to see my cards in print in the September and October edition of Making Cards, making a little appearance on the front cover on the October edition.

November was spent making scary plans for 2016 eeeep!

CHAUKv4 - MEMBER

December was long hours working hard to achieve existing goals but it doesn’t seem like work when you are having a ball! More change then came but more about that later.

The last day of the year was celebrated with a bang, celebrating the new January edition of Making Cards magazine. And once again a made the front cover, bottom left!

mag

So that takes us to 2016, it’s going to be a cracker!

Clare x

Focus On The Good Times

Hands up who needs more hours in the day? meeeeee! Also who needs a day in between Saturday and Sunday? eh that would be me also! To say life is busy right now is an understatement but it’s an amazing kind of busy and one I’m very thankful for.

So last week it was a bit of touch and go whether or not I’d have my Messy Fun Friday eeeep! But the thought of having to wait another week was just crazy. So I sneaked in my studio Friday night once the children were in bed ha ha!

I had drawn a baby penguin and it’s mother, with a plan to create a wintry page. Unfortunately with all the best intentions I wasn’t really in the wintry creating mood so I created a bright, happy page. But that’s ok, I had another plan…note always have a plan B!

A few weeks ago I doodled an image of a girl holding a camera on a small post. The image was then re drawn on larger scale in my sketch book. It was then scanned into my computer and tidied up using photo editing software.I now have an image that can be used for future use and it can be used time and time again.

photo (3)
A little close up

Here’s how I created my journal page…..

photo 1
Cover A4 mixed media paper with white acrylic paint. Whilst the paint is still moist use a wet baby wipe to add small areas of blue paint.
photo 3
Sponge the same blue and lime green paint through a circle stencil onto the background.
photo 4
Scrape black paint around the edges using a palette knife. Dilute black paint with water and using a small paintbrush, flick the paint. Again using black paint stamp small. Next add some lines using a gift/credit card.
photo 5
Add larger circles using black paint and a bottle top. Now using blue and green paint stamp smaller, swirly circles
photo 2
The page needed a contrasting colour so I added orange, again using paint and a circle stamp.
photo 4
More black paint circles were stamp and I also created some doodling using a white Signo Uniball pen.
photo 1
The word focus was added using stickers. They are actually pink but quickly changed to black using an alcohol pen. I used the cellotape image transfer technique and lifted some text from a book.
photo (3)
Finally I added some journaling using word stickers.

Materials used

  • Acrylic paints –  Cadmium Orange Hue (619), Primary Blue (159), Black (026) ,white (011) (Daler Rowney) and Citron Green (Americana)
  • Journaling- white gel pen (Signo Uniball)  
  • Stencils – Chequered dots (Dylusions)
  • Image –  Hand drawn by me
  • Stamps – Zentangle stamp set (Sarah Hurley)
  • Junk stamping – gift card, bottle tops
  • Stickers – Stash
  • Words – Tim Holtz
  • Alcohol pens – Shinhan

Techniques used

  • Image transfer
  • Stenciling
  • Junk stamping
  • Doodling
  • Sketching

All that is left is to add my image which I’ll post about another day.

Have a great weekend

Clare x


Let It Snow

Brrrrrrr it’s cold outside today which is very apt for todays post.

Friday afternoon was dedicated to my Messy Fun Friday where I created this little snowy scene. I was inspired by snow and this video.

 photo 2

photo 3

The background is created using Paperarsty Fresco Finish chalk paint (Beach Hut) and blue acrylic paint. Splashes of white paint were added to create the illusion of stars. Hill were cut freehand from old  book pages.

The moon is created by die cutting a circle onto card and using it as a mask. White acrylic paint was then sponged through the mask. Once dry I outlined it using a fine black liner.

The snowman was created by cutting 3 circles by free hand then outlined in black liner. I also used the pen to add arms and eyes. The nose was made from a triangular piece of orange card. Finally a scarf was added using ribbon.

I didn’t have any black stickers so I coloured some pink spotty ones using a black alcohol pen.

To complete the page I punched several snowflakes and randomly stuck them across the page.

Thank you for visiting my page

Clare x

Frosty Festivities 2015 Blog Hop

Hello and welcome to my blog and Jennifer Grace’s Frosty Festivities blog hop.

As you hop from blog to blog you will be inspired by a winter or Christmas crafty project having lots of fun along the way.

You should have arrived from  Claire’s  blog, if not hop back to Jennifers blog where the blog kicks off!

For this hop I decided to share a journal page that was inspired by a video tutorial created by my super talented friend Jaine.

Untitled

I’ve only just started to dip my toe into the world of journaling and mixed media having challenged myself to create a page every week eeeeeep! Just search for Messy Fun Friday for all my posts.

 Hope you have enjoyed my Christmas inspired project and the hop so far.Now it’s time to hop on over to  Daphne’s blog.

Have a great day!

Clare x

Frosty Festivities 2015

Hands up who loves to have lots of fun and who also loves a giveaway!!!

Jennifer Grace’s Frosty Festivities is in full swing, where she is posting daily for the whole month of November.  More details can be found on her Jennifer Grace Creates blog.

I was asked to join in with a blog hop which will be starting @ 2pm on Sunday 15th of November. As you hop from blog to blog you will discover a winter or Christmas crafty inspired project.

Until then have a great day whatever your plans may be.

Clare x